AWS Elastic Load Balancing(ELB)を試してみる
- 2019.10.18
- AWS
はじめに
AWS の (Elastic Load Balancing) ELB を使ってどのように設定して、どのように動作するかの確認をしてみたいと思います。
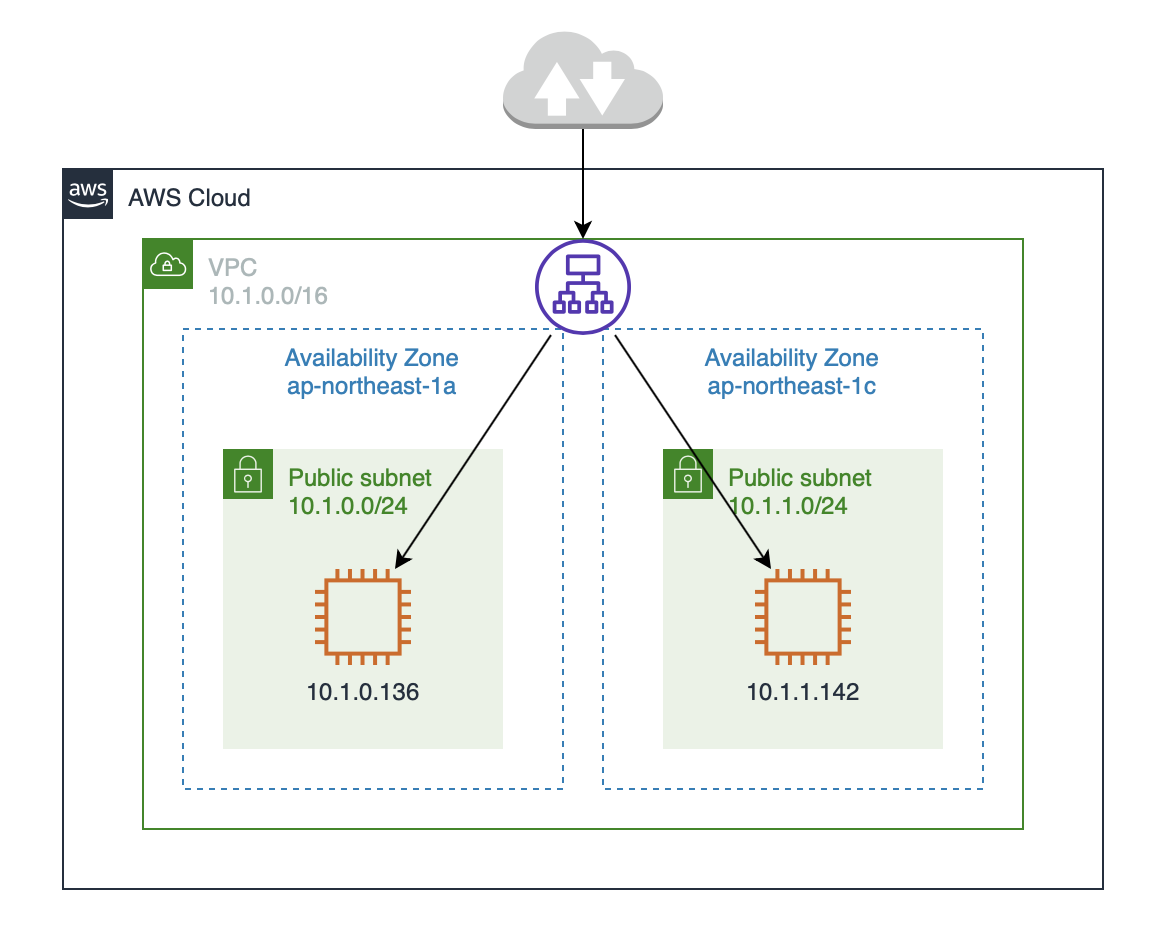
ELB構築前の環境
ELB構築前に事前に次のような環境を構築しておきます。

各インスタンスに簡易Webサーバーを立てる
まず、それぞれのEC2インスタンスに次のようなhtmlファイルを置いておきます。
<html>
  <body>
    EC2 10.1.0.136
  </body>
</html>
もう一つのEC2インスタンスには次のようなhtmlファイルをおきます。
<html>
  <body>
    EC2 10.1.1.142
  </body>
</html>
次にELBの動作確認用に各インスタンスにPythonで次のように簡易Webサーバーを立てます。
$ nohup sudo python -m SimpleHTTPServer 80 &セキュリティグループの作成
ELBに設定するセキュリティグループを作っておきます。
$ aws ec2 create-security-group --group-name ElbTestGroup --description "Elb Test Security Group" --vpc-id $vpc_id
{
    "GroupId": "sg-05a3c4169d03481be"
}
$ seurity_id= sg-05a3c4169d03481be
$ aws ec2 authorize-security-group-ingress --group-id $security_id --protocol tcp --port 80 --cidr 0.0.0.0/0
$ aws ec2 describe-security-groups --filter Name=group-id,Values=$security_id
{
    "SecurityGroups": [
        {
            "Description": "Elb Test Security Group",
            "GroupName": "ElbTestGroup",
            "IpPermissions": [
                {
                    "FromPort": 80,
                    "IpProtocol": "tcp",
                    "IpRanges": [
                        {
                            "CidrIp": "0.0.0.0/0"
                        }
                    ],
                    "Ipv6Ranges": [],
                    "PrefixListIds": [],
                    "ToPort": 80,
                    "UserIdGroupPairs": []
                }
            ],
            "OwnerId": "281230433728",
            "GroupId": "sg-05a3c4169d03481be",
            "IpPermissionsEgress": [
                {
                    "IpProtocol": "-1",
                    "IpRanges": [
                        {
                            "CidrIp": "0.0.0.0/0"
                        }
                    ],
                    "Ipv6Ranges": [],
                    "PrefixListIds": [],
                    "UserIdGroupPairs": []
                }
            ],
            "VpcId": "vpc-04e72e6413b624d29"
        }
    ]
}
ELBの作成
次にELBを作成していきます。
$ aws ec2 describe-subnets --filter Name=vpc-id,Values=$vpc_id
{
    "Subnets": [
        {
            "AvailabilityZone": "ap-northeast-1c",
            "AvailabilityZoneId": "apne1-az1",
            "AvailableIpAddressCount": 250,
            "CidrBlock": "10.1.1.0/24",
            "DefaultForAz": false,
            "MapPublicIpOnLaunch": true,
            "State": "available",
            "SubnetId": "subnet-0f2edab09ccc98c0f",
            "VpcId": "vpc-04e72e6413b624d29",
            "OwnerId": "281230433728",
            "AssignIpv6AddressOnCreation": false,
            "Ipv6CidrBlockAssociationSet": [],
            "SubnetArn": "arn:aws:ec2:ap-northeast-1:281230433728:subnet/subnet-0f2edab09ccc98c0f"
        },
        {
            "AvailabilityZone": "ap-northeast-1a",
            "AvailabilityZoneId": "apne1-az4",
            "AvailableIpAddressCount": 250,
            "CidrBlock": "10.1.0.0/24",
            "DefaultForAz": false,
            "MapPublicIpOnLaunch": true,
            "State": "available",
            "SubnetId": "subnet-0b99e52d17314979d",
            "VpcId": "vpc-04e72e6413b624d29",
            "OwnerId": "281230433728",
            "AssignIpv6AddressOnCreation": false,
            "Ipv6CidrBlockAssociationSet": [],
            "SubnetArn": "arn:aws:ec2:ap-northeast-1:281230433728:subnet/subnet-0b99e52d17314979d"
        }
    ]
}
まずはELBに所属させるサブネットの情報をしらべておきます。
$ aws elbv2 create-load-balancer --name elb-test --subnets subnet-0f2edab09ccc98c0f subnet-0b99e52d17314979d --security-groups $security_id
{
    "LoadBalancers": [
        {
            "LoadBalancerArn": "arn:aws:elasticloadbalancing:ap-northeast-1:281230433728:loadbalancer/app/elb-test/9ad0b61024f0ebb8",
            "DNSName": "elb-test-hoge.ap-northeast-1.elb.amazonaws.com",
            "CanonicalHostedZoneId": "Z14GRHDCWA56QT",
            "CreatedTime": "2019-10-18T01:35:29.540Z",
            "LoadBalancerName": "elb-test",
            "Scheme": "internet-facing",
            "VpcId": "vpc-04e72e6413b624d29",
            "State": {
                "Code": "provisioning"
            },
            "Type": "application",
            "AvailabilityZones": [
                {
                    "ZoneName": "ap-northeast-1a",
                    "SubnetId": "subnet-0b99e52d17314979d"
                },
                {
                    "ZoneName": "ap-northeast-1c",
                    "SubnetId": "subnet-0f2edab09ccc98c0f"
                }
            ],
            "SecurityGroups": [
                "sg-05a3c4169d03481be"
            ],
            "IpAddressType": "ipv4"
        }
    ]
}
$ elb_arn=arn:aws:elasticloadbalancing:ap-northeast-1:281230433728:loadbalancer/app/elb-test/9ad0b61024f0ebb8
ここで表示されたDNSNameが接続するときのURLになります。
http://elb-test-hoge.ap-northeast-1.elb.amazonaws.com
ターゲットグループの作成
次にEC2インスタンスを所属させるターゲットグループを作成します。
$ aws elbv2 create-target-group --name elb-test-target --protocol HTTP --port 80 --vpc-id $vpc_id
{
    "TargetGroups": [
        {
            "TargetGroupArn": "arn:aws:elasticloadbalancing:ap-northeast-1:281230433728:targetgroup/elb-test-target/97e404a876deeb18",
            "TargetGroupName": "elb-test-target",
            "Protocol": "HTTP",
            "Port": 80,
            "VpcId": "vpc-04e72e6413b624d29",
            "HealthCheckProtocol": "HTTP",
            "HealthCheckPort": "traffic-port",
            "HealthCheckEnabled": true,
            "HealthCheckIntervalSeconds": 30,
            "HealthCheckTimeoutSeconds": 5,
            "HealthyThresholdCount": 5,
            "UnhealthyThresholdCount": 2,
            "HealthCheckPath": "/",
            "Matcher": {
                "HttpCode": "200"
            },
            "TargetType": "instance"
        }
    ]
}
$ target_arn=arn:aws:elasticloadbalancing:ap-northeast-1:281230433728:targetgroup/elb-test-target/97e404a876deeb18
ターゲットグループにEC2インスタンスを登録
作成したターゲットグループにEC2インスタンスを登録します。
まずは登録するEC2インスタンスのIDを確認しておきます。
$ aws desc-ins-vpc $vpc_id
[
    {
        "InstanceId": "i-004f1416b8698713c",
        "State": "running",
        "AvailabirityZone": "ap-northeast-1c",
        "PrivateDnsName": "ip-10-1-1-142.ap-northeast-1.compute.internal",
        "PrivateIpAddress": "10.1.1.142",
        "PublicDnsName": "ec2-hoge.ap-northeast-1.compute.amazonaws.com",
        "PublicIpAddress": "hoge",
        "Name": null
    },
    {
        "InstanceId": "i-067f774504d9dd09b",
        "State": "running",
        "AvailabirityZone": "ap-northeast-1a",
        "PrivateDnsName": "ip-10-1-0-136.ap-northeast-1.compute.internal",
        "PrivateIpAddress": "10.1.0.136",
        "PublicDnsName": "ec2-hoge.ap-northeast-1.compute.amazonaws.com",
        "PublicIpAddress": "hoge",
        "Name": null
    }
]
ここで使っているaws desc-ins-vpc $vpc_id は Alias に指定してあるコマンドです。
$ aws elbv2 register-targets --target-group-arn $target_arn --targets Id=i-004f1416b8698713c Id=i-067f774504d9dd09b
リスナーの作成
次にロードバランサーのリスナーを作成します。
$ aws elbv2 create-listener --load-balancer-arn $elb_arn --protocol HTTP --port 80  --default-actions Type=forward,TargetGroupArn=$target_arn
{
    "Listeners": [
        {
            "ListenerArn": "arn:aws:elasticloadbalancing:ap-northeast-1:281230433728:listener/app/elb-test/9ad0b61024f0ebb8/3ccc9be8a733bbac",
            "LoadBalancerArn": "arn:aws:elasticloadbalancing:ap-northeast-1:281230433728:loadbalancer/app/elb-test/9ad0b61024f0ebb8",
            "Port": 80,
            "Protocol": "HTTP",
            "DefaultActions": [
                {
                    "Type": "forward",
                    "TargetGroupArn": "arn:aws:elasticloadbalancing:ap-northeast-1:281230433728:targetgroup/elb-test-target/97e404a876deeb18"
                }
            ]
        }
    ]
}
ターゲットグループのヘルスチェック
登録したターゲットグループのヘルスチェックをしてみます。
$ aws elbv2 describe-target-health --target-group-arn $target_arn
{
    "TargetHealthDescriptions": [
        {
            "Target": {
                "Id": "i-067f774504d9dd09b",
                "Port": 80
            },
            "HealthCheckPort": "80",
            "TargetHealth": {
                "State": "healthy"
            }
        },
        {
            "Target": {
                "Id": "i-004f1416b8698713c",
                "Port": 80
            },
            "HealthCheckPort": "80",
            "TargetHealth": {
                "State": "healthy"
            }
        }
    ]
}
2つのインスタンスとも healthy になっています。
動作確認
それではブラウザで接続してみます。
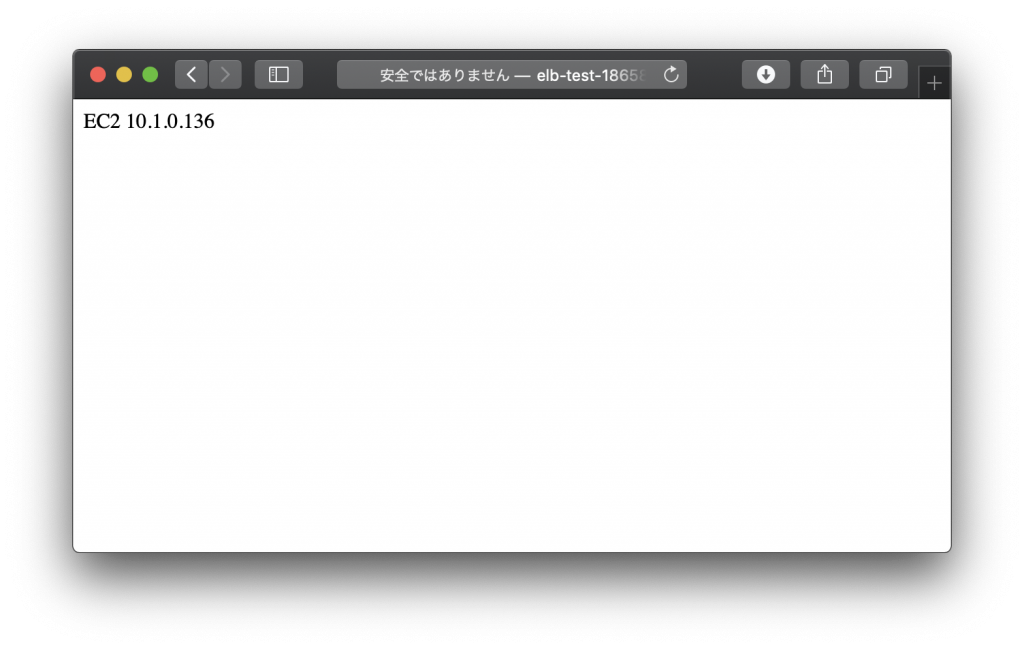
正常に表示されました。
リロードしてみます。
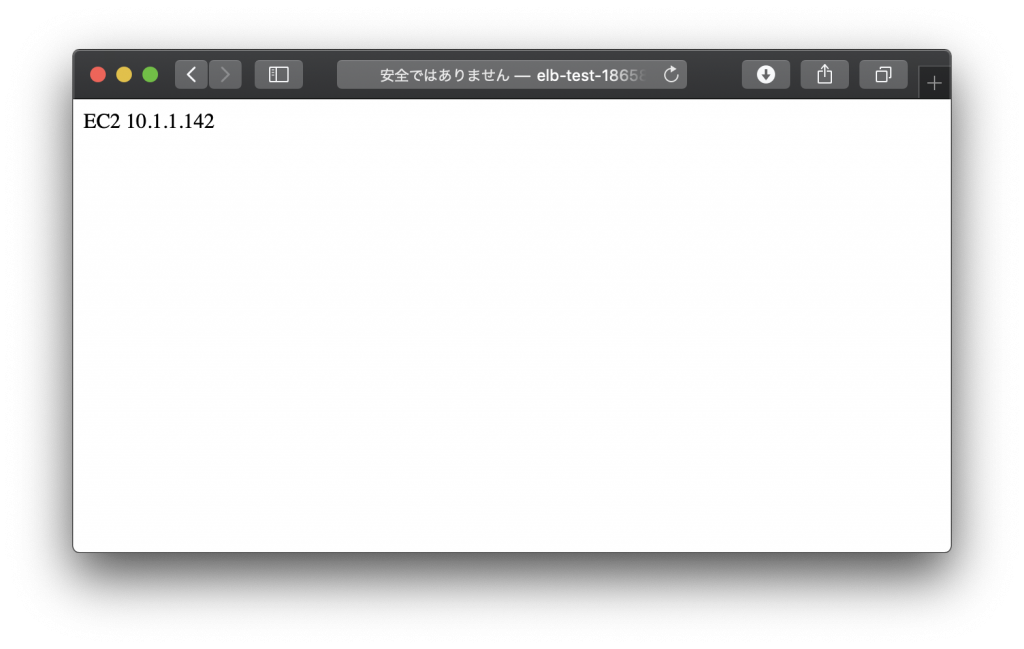
もうひとつのEC2インスタンスが表示されています。
このあともリロードするたびにEC2インスタンスが切り替わります。
今回の作成方法で作成したロードバランサーはApplication Load Balancerという形式のロードバランサーが作成されます。このロードバランサーはリクエスト数や接続数が少ないEC2インスタンスを選んで負荷分散してくれるため、このような動作となります。
次にこんなことを試してみます。
$ aws ec2 stop-instances --instance-ids i-067f774504d9dd09b
{
    "StoppingInstances": [
        {
            "CurrentState": {
                "Code": 64,
                "Name": "stopping"
            },
            "InstanceId": "i-067f774504d9dd09b",
            "PreviousState": {
                "Code": 16,
                "Name": "running"
            }
        }
    ]
}
EC2インスタンスを一台停止してみます。

この状態では何回リロードしても同じEC2インスタンスが表示されます。
期待通りの動作をしてくれました。
-
前の記事
AWS CLI Ailas を使って入力を簡単にする 2019.10.17
-
次の記事

AWS Auto Scalingの構築 2019.11.01